What Does Gutenberg Change In WordPress?

What Does Gutenberg Change In WordPress?

If you are looking to learn about Gutenberg in advance of the WordPress 5.0 release date, the best thing you can do is install the Gutenberg Ramp Plugin and give it a try for yourself. There are plenty of WordPress Gutenberg tutorials out there, but until WP 5.0 drops, we don’t really know what the effects will be. But so far, it seems to be mostly positive.

“For most casual users, it will, after some growing pains, bring a more flexible content creation experience.

Non-developers will be able to intuitively craft more complex layouts with extra elements like buttons, content embeds, and lots more. And that will, hopefully, help WordPress to continue to grow.”

Colin Newcomer on CodeinWP

WordPress Gutenberg Introduction

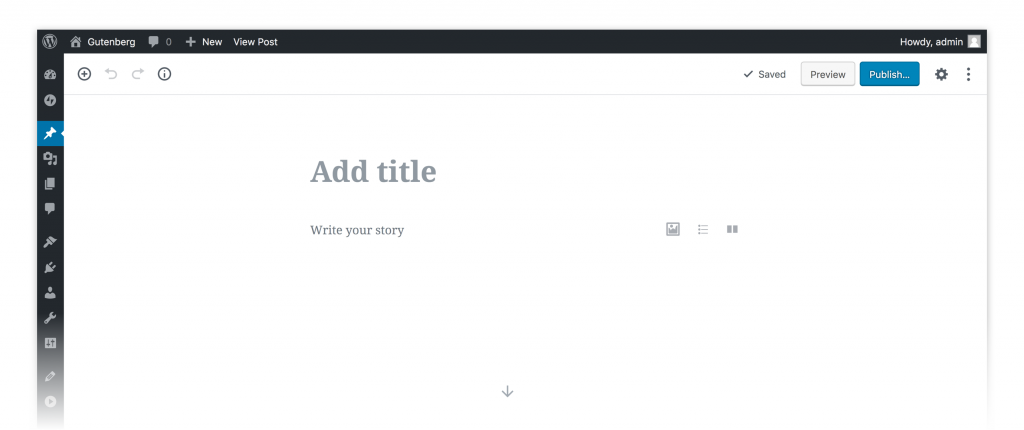
The new editor is clean, sleek, and simple. As I said in my first-ever Gutenberg post on my personal blog, “If Medium and the WordPress WYSIWYG had a baby, it would be named Gutenberg.” It’s a much more intuitive user interface that will enable newer bloggers to create content easily and fluidly.

“Gutenberg is an obvious reaction to competitors of WordPress; the writing experience of Medium, the quick and easy site builds using Wix and Squarespace.”

Iain Poulson on Delicious Brains

Gutenberg was revealed in mid-2017 by Matt Mullenweg during an interview with Om Malik, and ever since then, there has been a lot of anticipation for this new editor. Because WordPress is open source, none of this has been secret, and friendly geeks have been investigating the ins and outs of the software as it develops. Some of the links below have detailed tutorials on how to use Gutenberg for your WordPress website, with some tutorials in text, some in video, and a few in gifs.

How do I install Gutenberg on my website?

First off, let’s determine whether or not you have WordPress 5.0 or not.

How to install Gutenberg on your WordPress 5.0 Website

Step 1: Install WordPress.

That’s it. The WordPress core will have Gutenberg standard on every WordPress installation.

How to install Gutenberg on your WordPress 4.X site

  • Go to Plugins → Add New
  • Search for “Gutenberg” (I used Gutenberg Ramp plugin, it worked fine)
  • Click Install Now
  • Wait – Install Now button will change to Activate
  • Click Activate

Installing Gutenberg early will give you the chance to see what it does with your website; if things will break, if things will go smoothly, or if it’s way above your head.

Gutenberg FAQ

What will Gutenberg change in my WordPress site?

After WordPress 5.0, Gutenberg will change the Post Editor (and Page Editor) that you use to create new posts and pages. All the remaining WordPress functionality will be unchanged.

Can I use my page builder with Gutenberg?

Yes and no. Yes, on the website, but no, not on the page.

Yes, you can use a page builder on a WordPress 5.0 website that uses Gutenberg as the core editor. No, you cannot use the Gutenberg editor and your Page Builder editor on the same page.

This website is built in the Divi theme, and uses the Visual Builder as the page builder for many pages (and even some posts). If I compose a post in Gutenberg, and then try to transition that post to the Visual Builder, it used to remove all coding in the easiest way possible: it will delete all the content in the post.

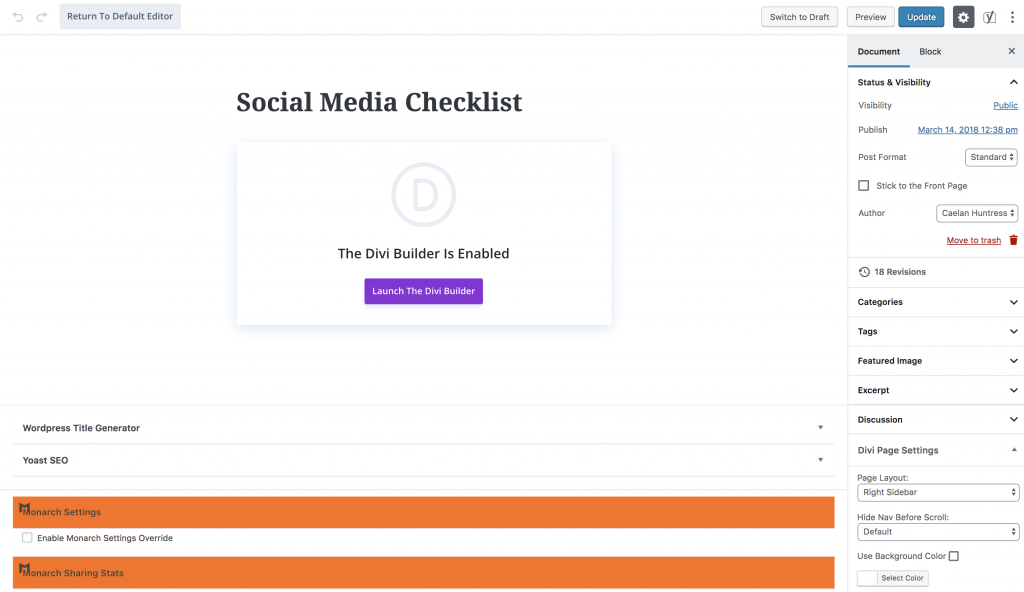
I tried a Gutenberg-to-Visual Builder conversion, and it refused to convert, I couldn’t even access the Visual Builder. But it did preserve the Visual Builder shortcodes.

wordpress gutenberg tutorials screenshot

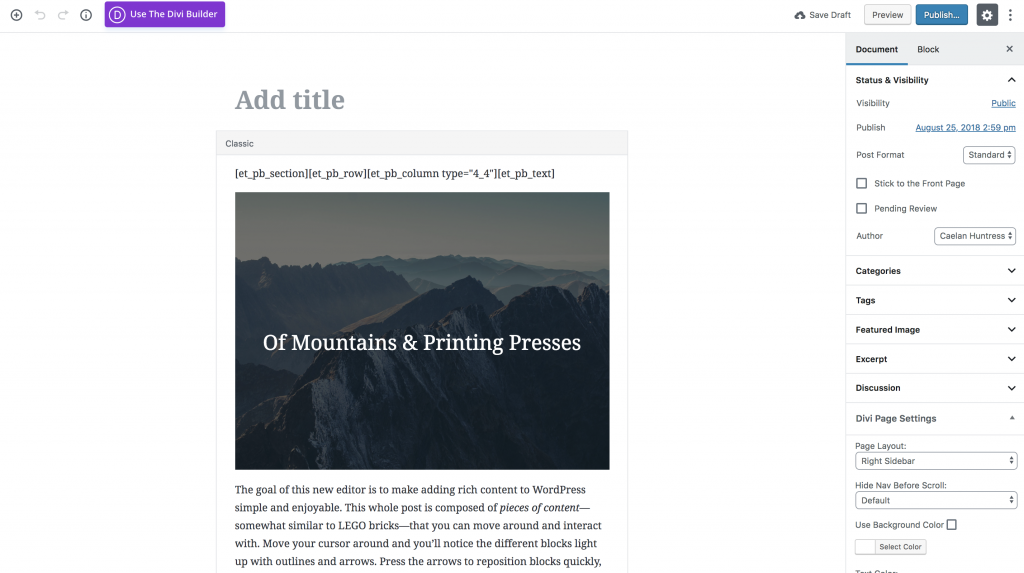
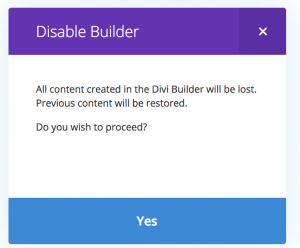
I tried a Visual Builder-to-Gutenberg conversion, and this is what the screen looks like when you try to go to the Classic Editor:

wordpress gutenberg tutorials classic editor

If you try to return to Default Editor, or get to Gutenberg, you’ll lose it all:

gutenberg tutorials divi builder visual builder

Will Gutenberg change my eCommerce Store?

Since Products are a Custom Post Type, they will not (currently) be able to use Gutenberg without extra enhancement.

However, since I use WooCommerce on as the shopping cart on this website, I did see a neat little notice on here after I installed Gutenberg:

gutenberg tutorials woocommerce integratione

I did this to get one of my basic page-builder functions in Gutenberg, and it is something I can already do with WooCommerce shortcodes, but this is what a Product Block looks like in Gutenberg:

Can I keep the old version of WordPress instead of using Gutenberg?

I am quite sure there will be a plugin to attempt doing that, as there is always a plugin to handle any feature the user base wants; but since the old Tiny MCE editor is embedded in the core, it would take quite a hefty piece of code to transition it back.

If you really need to keep the old editor and refuse to use Gutenberg, your best bet is to stick with WordPress 4.9 and manually install any security updates, keeping your website increasingly obsolete. I’m sure this will be an appealing option for many to begin with, but I suspect that most people will upgrade in due course. 

How hard is it to learn Gutenberg?

Try one of the Gutenberg tutorials linked in this post, you’ll see how easy it is. Like any learning curve, though, it depends on your aptitude and your interest.

Writing a blog post in Gutenberg won’t be much different than writing a blog post in Medium, but it will have a lot of the core WordPress functionality and integration. Getting all of the new features to sync up will take a little study, but it’s not very difficult. I’ve found it to be very user-friendly – read the first post I wrote in Gutenberg, with glitches, here: https://caelanhuntress.com/2018/08/12/gutenberg-is-coming-to-wordpress/

How long does it take to learn Gutenberg?

It’s not long. After 3-4 posts, a novice blogger should have the hang of it; experienced bloggers will only need 1-2 blog posts to pick up all the differences.

Are there Gutenberg tutorials?

One of the best Gutenberg tutorials I’ve found is the WP Engine Gutenberg for Beginners tutorial.  – This comprehensive tutorial is full of gifs and is very useful.

If you like video, the Yoast team put out a great video series of Gutenberg tutorials for free on YouTube:

Will my old WordPress posts be affected by Gutenberg blocks?
Will Gutenberg affect the SEO of my WordPress website?

What’s New: Gutenberg Blocks

The Blocks are the most fundamental change to the editor. The Gutenberg tutorials linked above go into them in some detail.

Users of Medium will recognize the interface intuitively; but because it’s WordPress, you have much more flexibility and control than with a typical Medium post.

When you pop the hood and look at the the code, the Blocks code is pretty simple. It looks like this:

<!– wp:core/text –> <!– /wp:core/text –> makes a text block. Everything within those bracket pairs can be moved around, drag-and-drop, within the Gutenberg editor.

“Previously, your content lived inside one big HTML file and for every enhancement there had to be something new: shortcodes, custom post types, embeds, widgets and the like. All with their quirky interfaces and weird behavior. Now, you can build your content precisely like you make a LEGO set: all from one box, following a standardized and straightforward set of instructions.”

–  Edwin Toonen on Yoast

This sounds great, on the surface, if you’re starting from scratch. But what if you have an older website?

If you use a lot of shortcodes in your theme, this could present some problems.

“Currently, shortcodes cannot be executed in text columns or paragraph blocks. They must be placed in the shortcode block in order to work. This can cause some problems if your shortcodes produce inline content like the year or an inline call to action.”

– Nathan Ingram on iThemes

Gutenberg Glitches

These are the glitches I noticed while composing my first post in Gutenberg:

  • Making links doesn’t always work. The Link editor doesn’t always take my text, and I often can’t add a link easily.
  • Sometimes when I mean to backspace a word, it deletes the entire text block.
  • There is no undo when this happens; the text block I am working on is just gone.
  • The Fixed Background option to make images parallax often masks the image entirely in the editor
  • Sometimes deleting blocks is problematic, and I have to convert to HTML and manually kill it in the code
  • The images don’t display in the Editor the way they do in preview

An easy caveat: I created this post using the Gutenberg Ramp plugin, on a WordPress core that is still made to support previous versions of WordPress. This is also the early stages of rollout, and I made this post without reading any Gutenberg tutorials, so I am quite sure these glitches will improve over time.

Others have noticed some glitches and hazards too:

“Doesn’t support responsive columns yet. We really hope this is coming. A lot of times this is a reason people install visual builder plugins or shortcode plugins, is to get the column feature alone. It is definitely time for columns to be in core!”

– Brian Jackson on Kinsta

“Backward compatibility is going to be a primary concern for most developers. It will destroy current plugins and themes, especially ones that require integration with TinyMCE.”

– Manish Dudharejia

Gutenberg Plugin Compatibility

“Since announcing the database on March 1st, 70 people have been granted testing status. However, of 5000 total plugins, we’re still at 4139 untested plugins. No companies have stepped up to contribute a significant amount of person-hours.”

– Daniel Bachhuber on his blog

Of the 861 tested plugins that Daniel tested in April of 2018:

  • 219 (25.44%) are compatible.
  • 518 (60.16%) are likely compatible.
  • 25 (2.9%) are likely not compatible.
  • 39 (4.53%) are not compatible.
  • 60 (6.97%) are in “testing”, which means someone started test and abandoned the process.

That’s a decent spread, and the numbers may have improved. But as Igor notes below, this could cause big difficulties for Custom Post Types:

“If your plugin has a custom post type, then you may want to disable Gutenberg for that particular post type. To disable Gutenberg for your custom post type, you can just change your post type configuration.”

– Igor Benić on Tuts Plus

When will Gutenberg be a part of my WordPress website?

The answer to that question is very personal.

When WordPress 5.0 is released, every WordPress website that upgrades is going to have Gutenberg installed as its core editor by default. If you want it earlier, you can install a plugin, as described above. If you don’t want to upgrade to 5.0, you can probably coast on WordPress 4.9 for a number of months without facing any serious issues.

So, you will have Gutenberg on your WordPress website when you want it. Get ready, because it’s coming. Read some Gutenberg tutorials, or better yet, give it a spin.

If you want to talk about what Gutenberg could do to your WordPress website, schedule a consultation.

Interview with Sean Ogle from Location Rebel

Interview with Sean Ogle from Location Rebel

This interview is the first episode of the Stellar Platforms Show! During this hour-long interview, I spoke with Sean Ogle of Location Rebel about the main tools he uses to run his membership website, the project management software he loves the most, and how he advises his members to identify their best target market.

We Talk About Location Rebel

Sean goes over the progression he’s gone through since launching Location Rebel in 2011, when it grew into a Frankenstein-like collection of tools. In 2016 he moved to an all-in-one system, the Rainmaker platform by Copyblogger – and in 2018 he moved back into WordPress, splitting off his tools into ‘best in class’ components.

We Talk About Running A Membership Website

When building a membership website, is it best to cobble all the pieces together, or do an all-in-one platform? Sean has some interesting perspectives on this idea. “It’s best to go with something that is best in class at what they do,” he reasons, because any all-in-one platform that’s trying to do 10 different things is going to do each of them 10% as well as it possibly could, and all these components could be 90% better.

Sean also advises against trying to sell too much right away in the early stages, and instead, focus on building a real connection with your audience. “If you can build up that core audience early on, and they trust you, they will buy your stuff early on when you’ve got it,” he says. 

“Another benefit you get from waiting,” he continues, “is you get to know your audience better.” This can be very helpful for publish-happy content producers, the types of people who often want to start a membership site.

“Figure out the problem you’re solving, and do the bare minimum to solve that problem.” – Sean Ogle

{clicktotweet}

We Talk About His Target Market

I asked Sean about the people who join Location Rebel, if they are looking to find a way to make money as a freelance writer, or trying to find a way that enables them to travel more. His answer was really surprising.

We Talk About His Newest Project

Sean not only helps people improve their business, he also helps them to enjoy their hobby more. Our interview took place just as Hobby Hacking launched, a new component of the Location Rebel community.

Listen in on the biggest lessons learned from an experienced membership site owner. There were lots of questions answered in the whole 55 minute interview – watch it below.

Social Media Marketing

Social Media Marketing

Social media marketing can be done well, or done badly. No matter how good you’re doing, it could be really easy for you, or really hard. The easiest way to make sure your social media marketing is both easy and good is to follow the advice of people who have mastered the mediums.

6 Small Business Social Media Marketing Tips

#1 – Say something valuable.

Seth Godin talks about ‘the trap of social media noise.’ Just because we can say things in so many places, to so many people, it doesn’t mean we should.

“Prune your message and your list and build a reputation that’s worth owning and an audience that cares.”

– Seth Godin

#2 – Don’t spread too thin.

Every account you set up will cost you, in time, energy, and mental overhead. Ask yourself which accounts are really necessary, and if you should skip one, then do it.

Ashley Kemper wrote a comprehensive overview at Marketing Land comparing each social media platform, with specific guidelines on when these different platforms make sense. Her recommendations are very detailed, so read her article if you have any questions about a specific platform. Her guidelines were:

  • Use Facebook if you want to reach a massive audience with a diverse array of content types.
  • Use Twitter if you have frequent updates or content with a “timeliness” factor.
  • Use YouTube if your business could benefit from product demos, testimonials, or putting a human face to your brand.
  • Use Google+ if you have a physical location and want to appear in local search results.
  • Use LinkedIn if you are in a B2B space, or you want to speak to a more professionally-oriented audience.
  • Use Pinterest if you want to target a female audience and have great visual content.
  • Use Instagram if you can create interesting visual content on a regular basis.
  • Use Foursquare if you have a brick-and-mortar location.

Read her article for more depth on each platform, if you’re not sure whether or not one of them is a good match for you.

#3 – Variety is the spice of social media.

Posting the same thing, all the time, isn’t giong to keep your audience engaged or interested. On the 8Days blog, Jimdo recommends a 70-20-10 formula.

“Don’t be overly promotional: Nobody likes someone who just talks about themselves all the time. 70% of your content should add value for your followers (such as sharing blog posts, coupons, etc.), 20% should be sharing other people’s content (posts from other businesses or highlighting customers), and only 10% should be directly promoting your business (such as “come by our store we have a new shipment of handbags!”).”

Social Media Marketing Formula:

  • 70% adding value
  • 20% sharing other people’s content
  • 10% direct promotion

For every promotional tweet you write, prepare to publish 10x that much content that is for connection and relationship-building.

#4 – Show Them The Wizard Behind the Curtain

Social media marketing is your opportunity to be seen by your audience, really seen. They don’t want to see your products; they want to see you, working at your craft. Share the stories of what it’s like to do what you do.

Ramsay at Blog Tyrant recommends being open on social media to create customer loyalty:

“Social media is a fantastic way to break down the barriers of facelessness. By showing your potential customers the people behind the business you are giving yourself a chance to be different from all the other competition. They will become loyal to you.”

– Ramsay

#5 – Get Popular To Get Seen

Popularity snowballs. The more that people like you, the more they like you, and it’s not just momentum; it’s math.

On the Buffer blog, Alfred Lua gives 10 social media tips, and describes the importance of popularity:

“Social media platform algorithms, such as those on Facebook and Instagram, are prioritizing posts with higher engagement on their feeds due to the belief that users will be more interested in seeing highly engaging content.”

– Alfred Lua

Collect likes, retweets, and shares, and you will rank higher ion the algorithm of social media platforms, and get seen more often.

#6 – Stay Authentic

Most people can sniff a sell-out, and it stinks. A genuine, long-term relationship can be completely derailed by staying in sales mode all the time.

Everybody needs to sell. It is, most often, why we get on a soapbox in the first place. But the only way to keep authenticity is by staying authentic, regularly.

As Timothy Skyes says in 8 Tips On How To Grow Your Social Media on Enterepreneur.com:

“You need to find that balance between popularity and business. You need to have a little bit of both and mix the more fun side that wants popularity with the serious and informative side that boosts the reputation of your business.”

– Timothy Sykes


Social Media Setup – Done For You, or DIY

If you need to get your new brand up and running on social media, you can hire Stellar Platforms to do it for you, or you can buy our DIY kit for a tenth of the price, and do it yourself.


Social Media Checklist

Social Media Checklist

Are you ready to set up all your social media accounts? This social media checklist will give you a step-by-step series of tasks to do, with instructions on how to do each step. Set aside a couple of hours, and when you are done, you will have completely new social media accounts for your brand on all the major platforms.

Social Media Checklist Table of Contents

  1. Decide on your username and password.
  2. Write your Bio
  3. Collect your branding assets.
  4. Create Your Social Media Accounts
  5. Upload your Logo and Cover Photos
  6. Fill out your Bio or Description
  7. Link to all of your social media accounts

Download Workbook

Step 1: Decide on your username and password.

For best results, a universal handle is easiest. When you set up Twitter, you will need to have your handle limited to 15 characters or less. Try and use the same handle for all your accounts. When you set up Twitter, if @yourhandle isn’t available, keep trying until you find a handle that you like, one that you could use anywhere and everywhere.

When I set up social media accounts for Wellness Website Design, the full name of the brand was too long for a Twitter handle. I went with @wellness_web, but on other platforms that allow for longer handles, I selected @wellnesswebsitedesign. This caused some friction later on, and when I have to enter all the social media profiles for this brand, I have to manually look up the link, like some sort of savage.

If there were one universal handle, like @wellwebd, then anytime there was a form to be filled out, or a profile to be completed, filling in the social media account links would be easy and fluid, because they would all end with the exact same handle.

Decide on one secure password in advance, different from all your other passwords, and use that same password for all of your social media accounts. This makes it easy to sign in to any platform; you don’t have to hunt down for the right password, because there is only one password. It also makes going through this social media checklist super easy.

Now, set up a new gmail account with this username and password.You can use a different unified email login for all your accounts (like [email protected]), but you will need this gmail account later for Youtube and Google Plus.

Step 2: Write your Bio

You can write your bio once, and copy and paste it into all of the other profiles. A short, concise paragraph describing who you serve, and what you do, is all you need.

“I help [these people] who [face this problem] by [your awesome solution].”

It can be tempting to skip this step, and write whatever comes to mind, but trust me: don’t.

As Evan LePage says on the HootSuite blog, “Why is your bio so important? In addition to sharing basic information about yourself, adding your website and email address turns any social network bio into a potential source of referral traffic. Especially on company pages, the opportunity to describe your products and link out to an external website makes bios a powerful marketing and sales tool.”

Step 3: Collect your branding assets.

Create a folder on your desktop, and call it ‘Branding Assets.’ This is where you’re going to collect the image files you will need for the rest of this process.

Open up a folder on your computer that has your logo files. If you have a square logo image file that is at least 300px wide, make a copy of it and put it in your Branding Assets folder. If you don’t have a 300px wide version of your logo, make one.

How to Make a Square Image Of Your Logo In 5 Easy Steps

  1. Go to Canva. This is the easiest, most intuitive graphic design tool on the internet. You don’t need to be a graphic designer to use it, and it makes it really easy to make everything look good.
  2. You will need a square version of your logo for most social media profile pictures, and a 300px wide version will work for all of them. Make one by signing into Canva, clicking ‘Use Custom Dimensions’ in the upper right, and put in 300 width x 300 height.
  3. Upload your logo.
  4. Drop it on the square canvas.
  5. Click ‘Download,’ and you’ve got a universal social media profile picture.

Put this 300px wide image of your logo (either .jpg or .png is fine) into your computer’s folder, along with any other visual assets you have that you would like to use.

Pro tip: make sure your logo works with a circle around it. If you have important colors or shapes in the corners, they may get cut off in some platform’s profile pictures.

What is a cover photo?

A cover photo is the second photo you will need for your social media profile. Many profiles allow you to upload a profile photo and a cover photo. The cover photo is the big background, and the profile photo is the smaller one.

To keep you on your toes, every cover photo size is different for every social media platform. Thankfully, Canva makes this easy; with a free account, you can use all their pre-sized templates, and export all the photos you need, at the perfect size.

Do I have to make different cover photos for every platform?

You don’t need to – you could use one high-resolution background photo that you like, and upload it as the cover photo on every platform, as you edit your profile there. But your photo may be cropped at an inconvenient place, and it may be pixellated, because it has to be resized, so it will look fuzzy.

You can select one high-quality stock photo that expresses the visual feeling of your brand, upload it to Canva, and then create cover photos for all your platforms at once. Then, you can export all these photos into your Branding Assets folder on your desktop, along with your 300px wide logo, and you’ll be all ready to get started.

Step 4: Create Your Social Media Accounts

Open this post in an incognito browser, so you can keep your social media checklist handy, and then Ctrl + Click on all these links to open them in new tabs:

Next, one at a time, sign up for accounts. If you are using a new email address, you can have that inbox open for review, or (even better) set that email address to automatically forward to your main email address.

You will need to confirm your accounts with this email address, for every new account you open.

**please note – the exception to this setup is Facebook. (As usual.)

Facebook often has its own rules and requirements, and as the most dominant social media network on the planet, it has earned that right.

For Facebook, you will need a personal account, which will be an admin of your brand’s Facebook Page. So you can sign in to your personal account, and create a Facebook Page with your brand assets. You won’t be able to customize the slug (the part of the URL after facebook.com/ that is) until after your page has 25 likes.

Social Media Setup Pro Tips:

  • Use the same handle, login email, and password for all accounts
  • Use Gmail for this email address, and it will set up your Google and YouTube accounts for you
  • Have the Branding Assets folder open on your desktop while you work
  • Click on all email address confirmations in one sitting

Step 5: Upload your Logo and Cover Photos

This is self-explanatory, but time consuming. You may run into difficulties. One of the platforms may have changed their sizing requirements, or need their file in a different format, or frustrate you for some other reason.

Stay calm. Take deep breaths. Persevere.

When you are done with the social media setup process, you will have branded visual assets on every social profile. It’s worth the challenge here; stick with it.

Pro tip: Canva gives you pre-sized templates for most cover photos.

Step 6: Fill out your Bio or Description

Be sure and include a link to your website on every profile. This is the true SEO benefit of this work; you will receive backlinks from high Page-Rank sites, which legitimizes your website in the eyes of search engines, so don’t skip this step.

Step 7: Link to all of your new accounts

There’s an easy way to do this: set up your personal page on about.me.

When you set up this personal profile page, you can copy and paste the links to all of your profiles here.

Now, whenever you need to access your profile links, just go to your about.me page, control+click on each icon, and you can copy and paste the links.

Other places you can put links to all of your profiles:

  • Your website footer
  • Your website sidebar
  • Your YouTube channel
  • Your personal Facebook profile page

Social Media Setup for Brand New Brands

Social Media Setup for Brand New Brands

There are so many social media platforms out there, it can be a challenge to launch your brand-new-brand everywhere across the internet at once. Social Media Setup can be difficult without an easy map. What’s the difference between all these social media platforms? Mark Chandler was good enough to describe the difference – using donuts.

Getting a donut onto all of these platforms can seem like a real chore. But don’t worry – you can set up social media accounts for your business in an afternoon, if you have a good social media checklist, your logo files, a pre-written bio, and a good tutorial.

How To Set Up Social Media Accounts for a Business

Social Media Setup Tip 1:

Use the same login credentials for all of your social media accounts.

Using the same email address and password for all of your new accounts will make it easy to set up (and manage) your social media accounts.

If you create a new email address just for this purpose, like [email protected], then you can even hand off logins for these accounts to someone else securely in the future.

Social Media Setup Tip 2:

Set up all social media accounts in one sitting.

Set aside an hour or two with this tutorial, and give yourself the time and space to do it right, and do it once.

Having multiple browser tabs will make this easy. To use multiple tabs, Ctrl + Click on a link and it will open in a new tab. If you press Cmd + T on a Mac, or Ctrl + T on a PC, you will open a new tab where you can manually type your URL.

Social Media Setup Tip 3:

Use an Incognito browser for setting up your business social media accounts.

If you already have other social media accounts, or a gmail address, then do yourself a favor and use an incognito browser to start fresh. This way, you won’t accidentally login to the wrong account, and connect them in a confusing way.

Using an incognito browser doesn’t make your activity invisible, however. As Heather Parry writes, “Chrome’s ‘Incognito’ might stop Chrome itself from logging your browsing data, but it doesn’t stop your operating system, your router, or the websites themselves from logging that you’re there. When streaming content, whether you’re in ‘Incognito’ mode or not, you open yourself up to data storing, and this mode does not hide your IP address, meaning that information such as your location, your browser, your operating system and even your physical address might still be seen.”

This means that going Incognito does not completely shield your activity, but it does give you the same browsing experience as if you were signed out of all your accounts.

How To Go Into Incognito Mode In Your Browser:

Press Cmd + Shift + N on a Mac, or Ctrl + Shift + N on a PC.

Use our Social Media Checklist to set up your new social media accounts

If you’d like Stellar Platforms to set up your social media accounts for you, we can do that. If you want to do it yourself, we can give you a video tutorial and a step-by-step guide to handle it yourself in an afternoon.

Read the Social Media Setup Checklist